Preparing The Winter Tunnel
It was an exciting day on the farm yesterday as we began preparing the beds inside our new winter tunnel for its first crops. These initial steps are critical to ensuring we get reliable harvests year after year. Today’s blog post will go over some of the preparation steps we’ve taken and some of the supplies and tools we need to complete the tunnel.
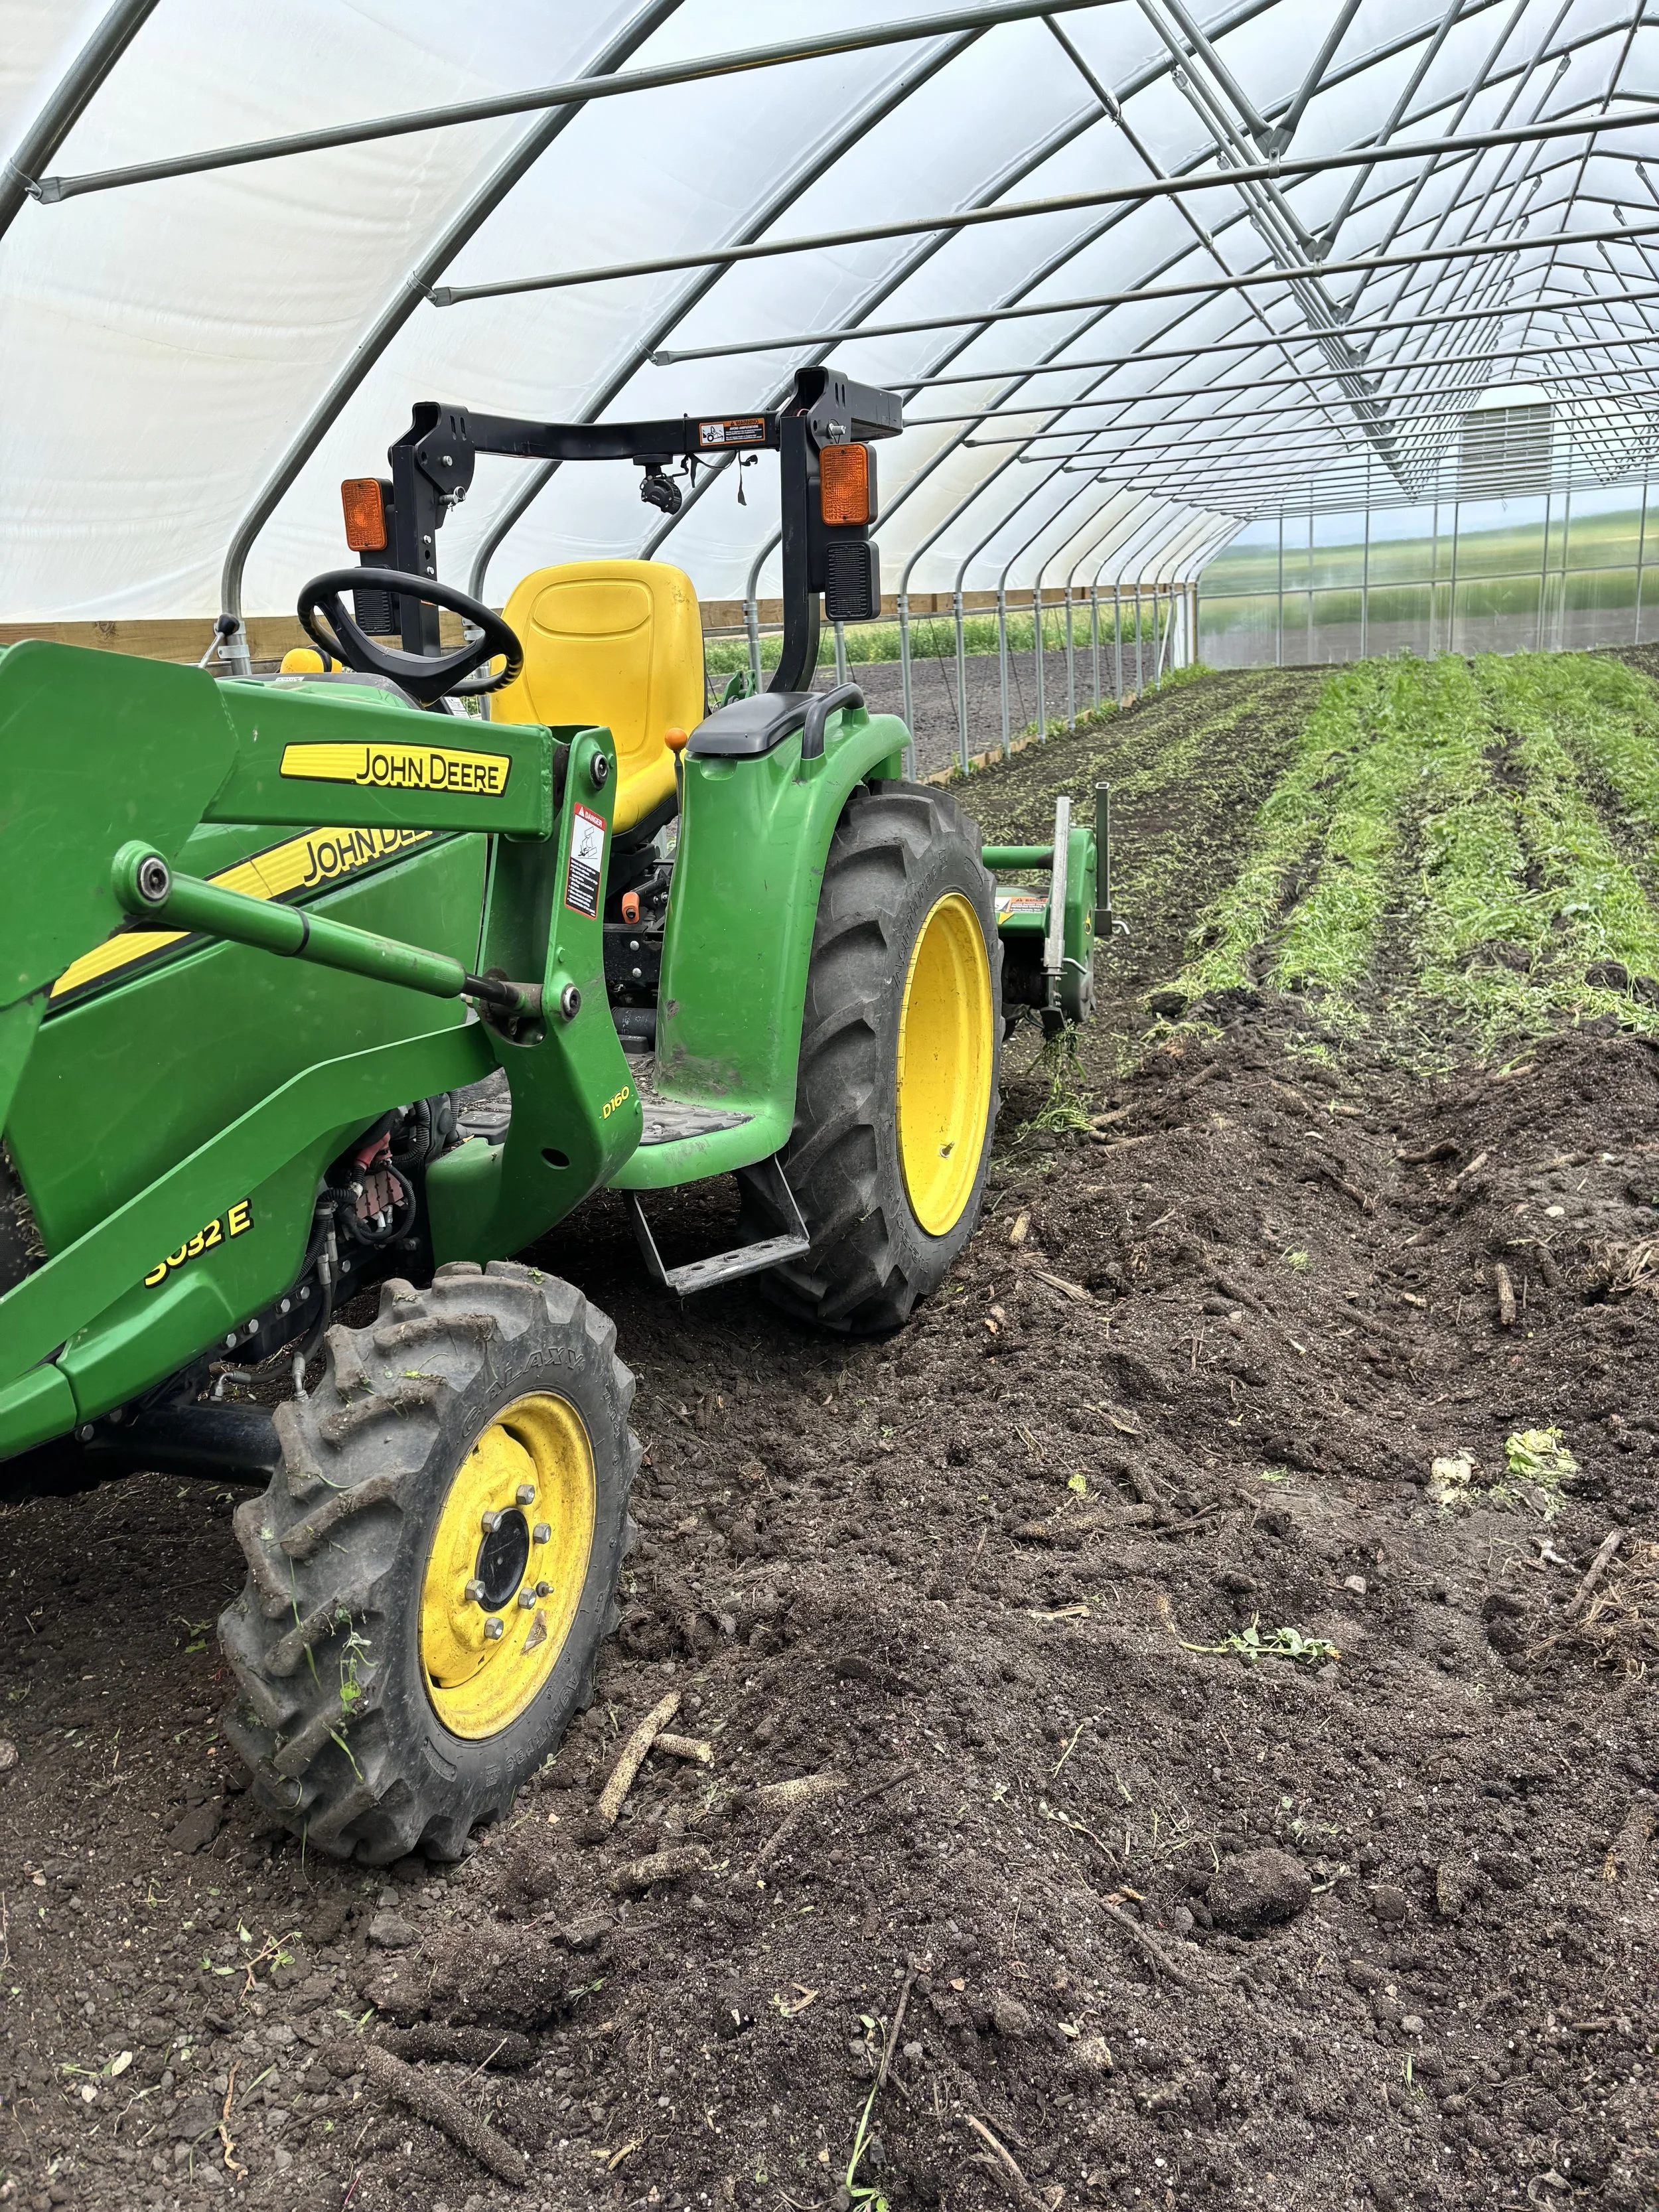
Preparing the beds within the tunnel for crops is the most important step and there were several factors contributing to how we approached this initial setup. First, we knew on one end of the tunnel that the soil was extremely compacted from tractor and gator traffic before the tunnel was constructed. We used a subsoiler and applied a very generous layer of compost on top to both break up compaction and add in some very high organic matter that will help loosen compaction over time.
Our spring cover crop didn’t come in as well as we would have liked and we had a lot of weeds poking through. We decided to use our roto-tiller to terminate the weeds and cover crop. Then we followed that with a bed shaper to make raised beds within the tunnel. We’ll leave the weeds lay for a a few days and then we may either till and reshape the beds or flameweed depending on our observations.
Once the beds are prepped we need some tunnel infrastructure to keep things alive. Of the highest importance is water: it doesn’t rain inside the tunnels! We will have both overhead and drip irrigation in our new tunnel. Depending on the time of year and crop that’s grown we use different irrigation techniques for the best plant health. We’ll also need power to our tunnel. Not only does it have a blower for the 2 layers of plastic but it has automatic, thermostatically controlled louvers and will have a thermostat, heater and blower for winter crops. We’re securing quotes for electrical connections in the tunnel so if you’re an electrician let us know!